
Introduction #
In today, more and more people are doing their shopping online. As a result, the eCommerce platforms are growing rapidly. Sellers can choose to start their business on some famous online eCommerce platforms, for example Amazon or eBay. Also, there are some open source shopping cart systems, for example OpenCart. If the sellers wished to start their business on their own server, this would be a good option.
Although sellers can earn good profit through online business, they must be careful and alert. This is because there are some people who like to commit fraud on the Internet. They will use disposable email addresses before committing fraud. For example, they will buy some products from the merchant, and after that initiate the chargeback process. By doing so, they will be able to get the product for free. But the merchant will suffer from the loss of the profit. Compounding the problem is the fact that disposable email addresses are also used by some legitimate customers. This is because they do not wish to receive newsletters from some websites or online shops. Of course, this just makes it harder for the merchant to track and interact with their customers.
In short, sellers should use some third party extensions to aid them in their online business, such as MailboxValidator OpenCart extension. This extension can save the seller time and effort, as it requires minimal steps to set up and run.
Setup the MailboxValidator OpenCart extension #
Before you start to setup and use the extension, you need to get a free API key from MailboxValidator. After that, download the latest version of the extension from here. Follow the steps below to setup the extension:
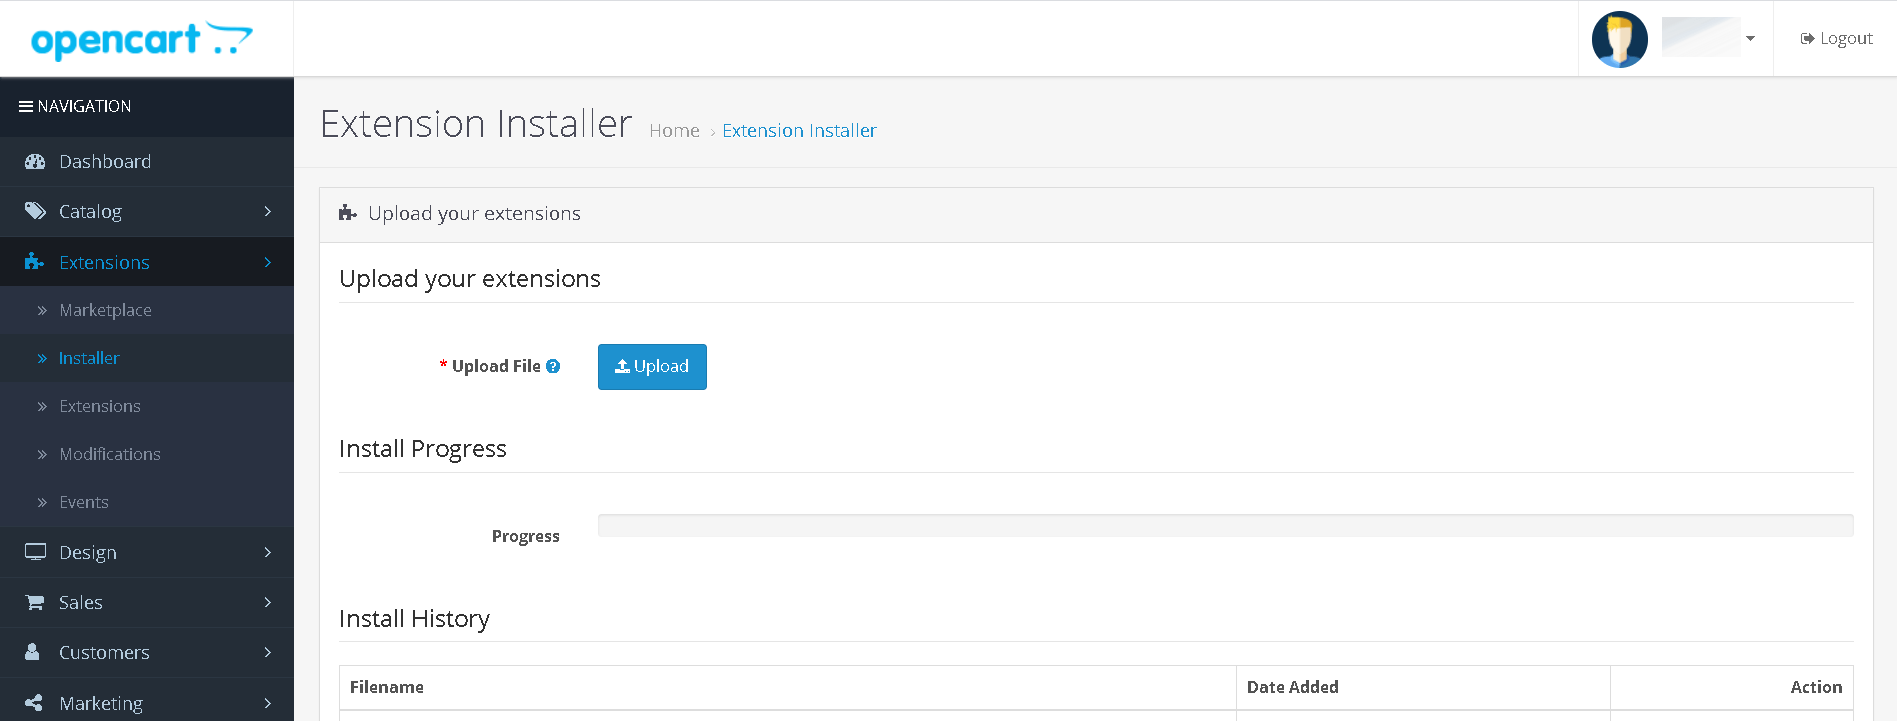
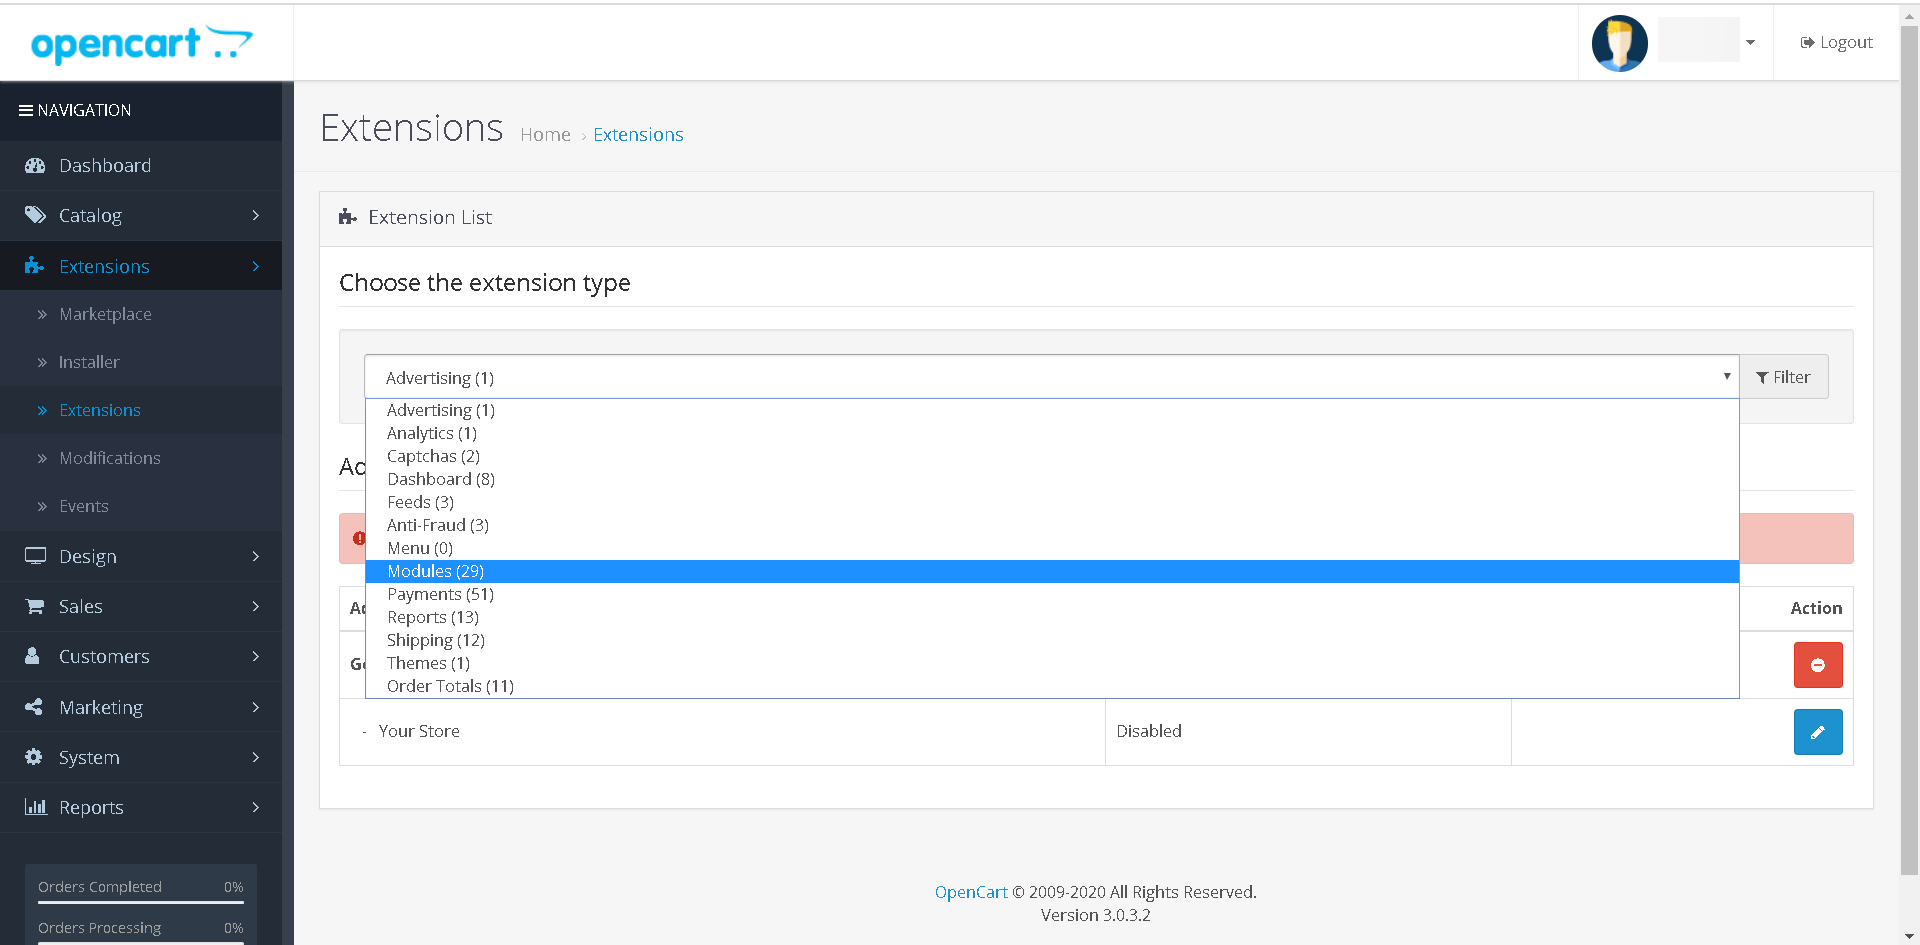
- Login to your OpenCart dashboard, go to the ‘Installer’ tab under the ‘Extensions’. Click the upload button and upload the zip file.

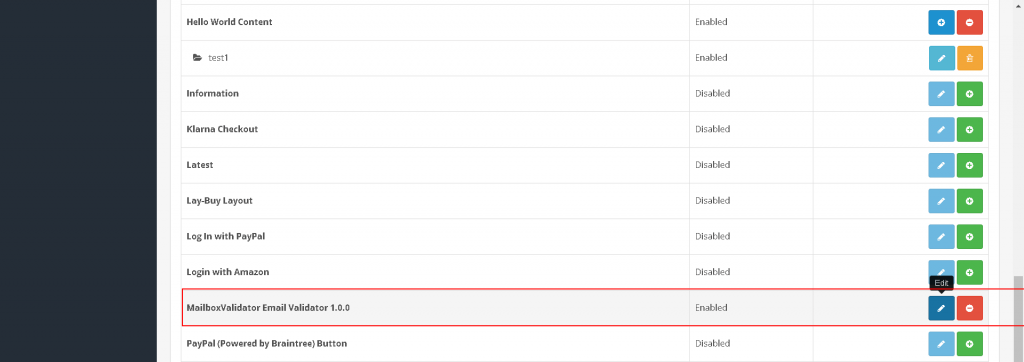
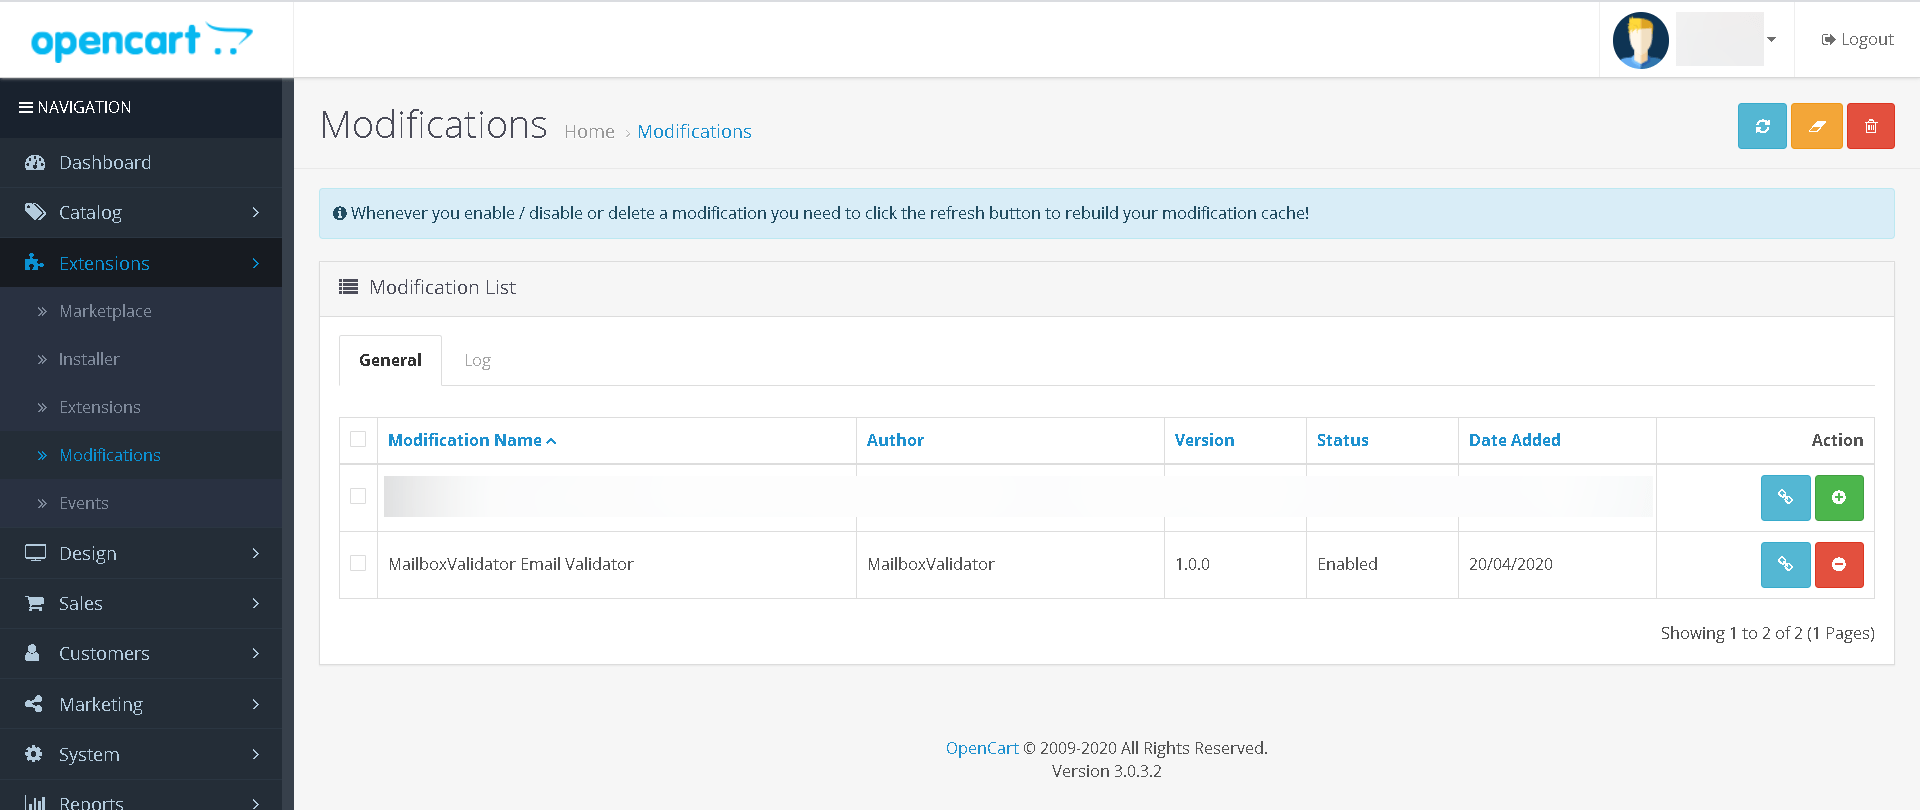
- Go to the “Modification” tab, click the enable button for “MailboxValidator Email Validator”. After that click the refresh button.

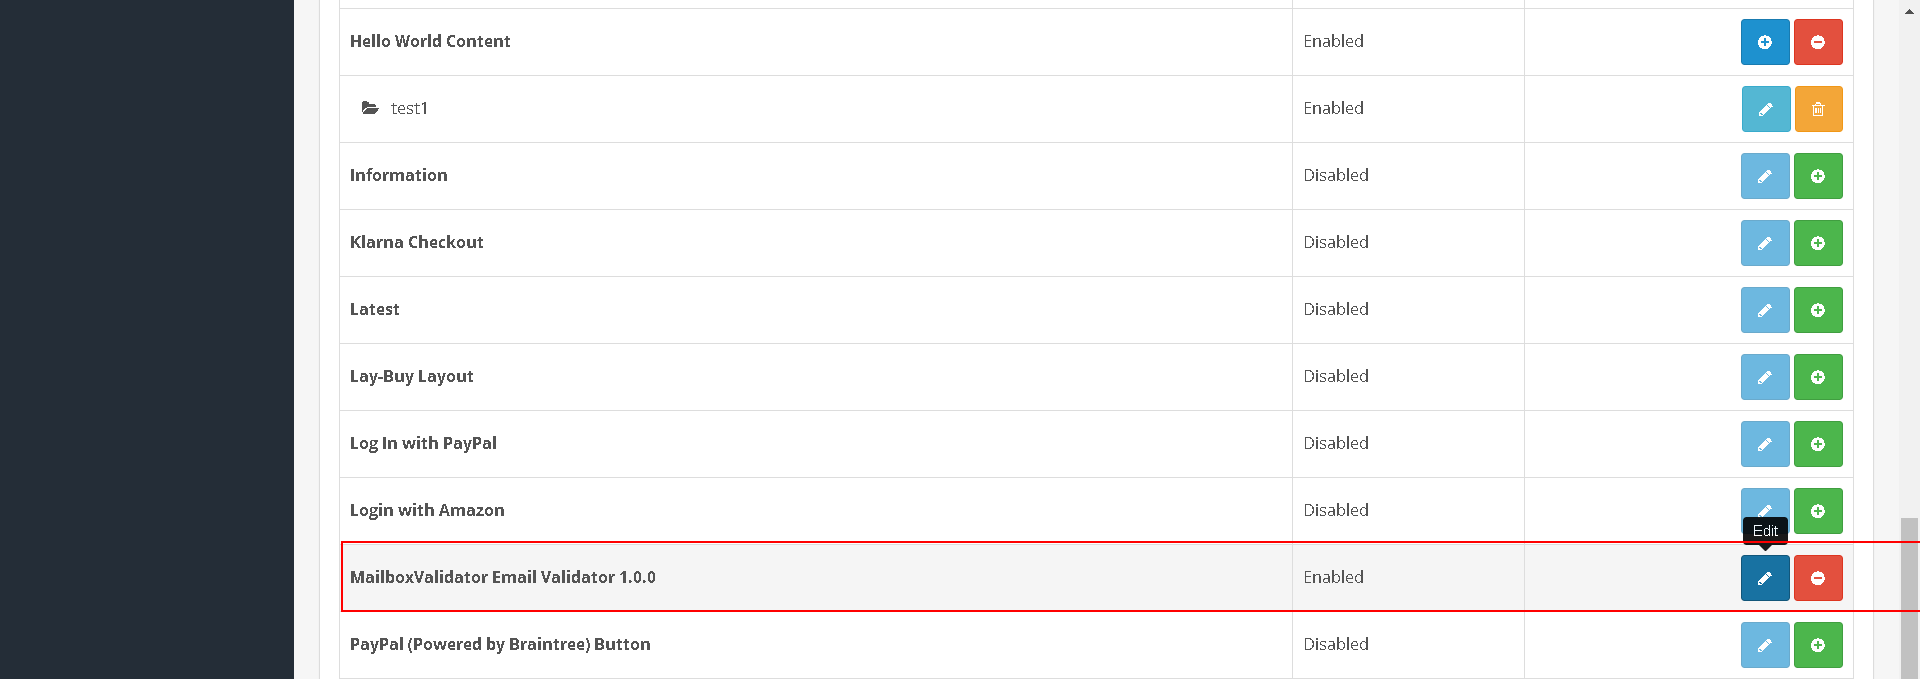
- MailboxValidator Email Validator” in the list, and click the edit button.

- You will be required to configure the settings. For example, you will need to enter the API key in the API key field. In the same page, there are a few email validators that are available, which are valid, disposable and free email validators. You will need to switch on or off for each email validator. Also, there is an additional field that lets you choose whether to enable debug mode or not. Enabling the debug mode may help in debugging possible issues. However, please note that the log file produced will consume your server disk space. So, proceed with caution. After you have done the settings for each field, click the “Save Changes†button to save your settings.
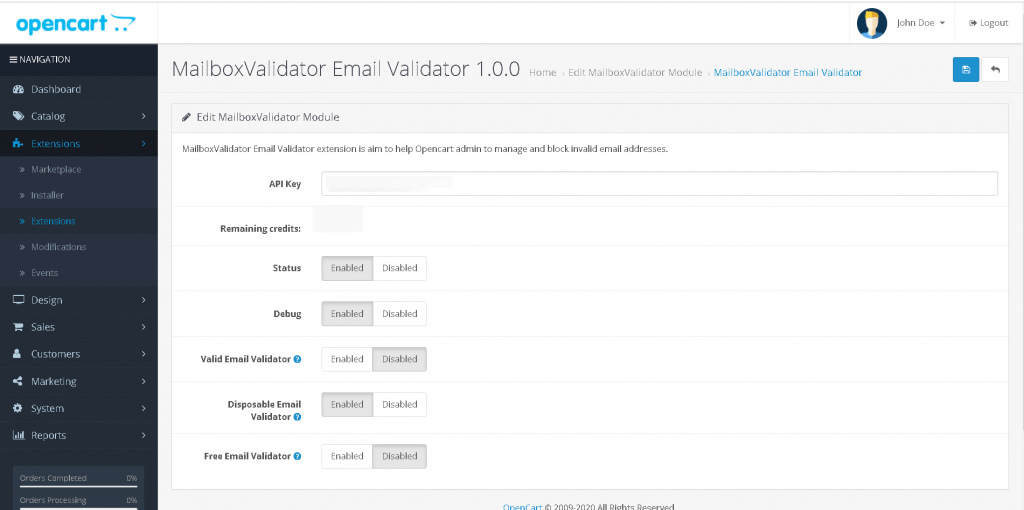
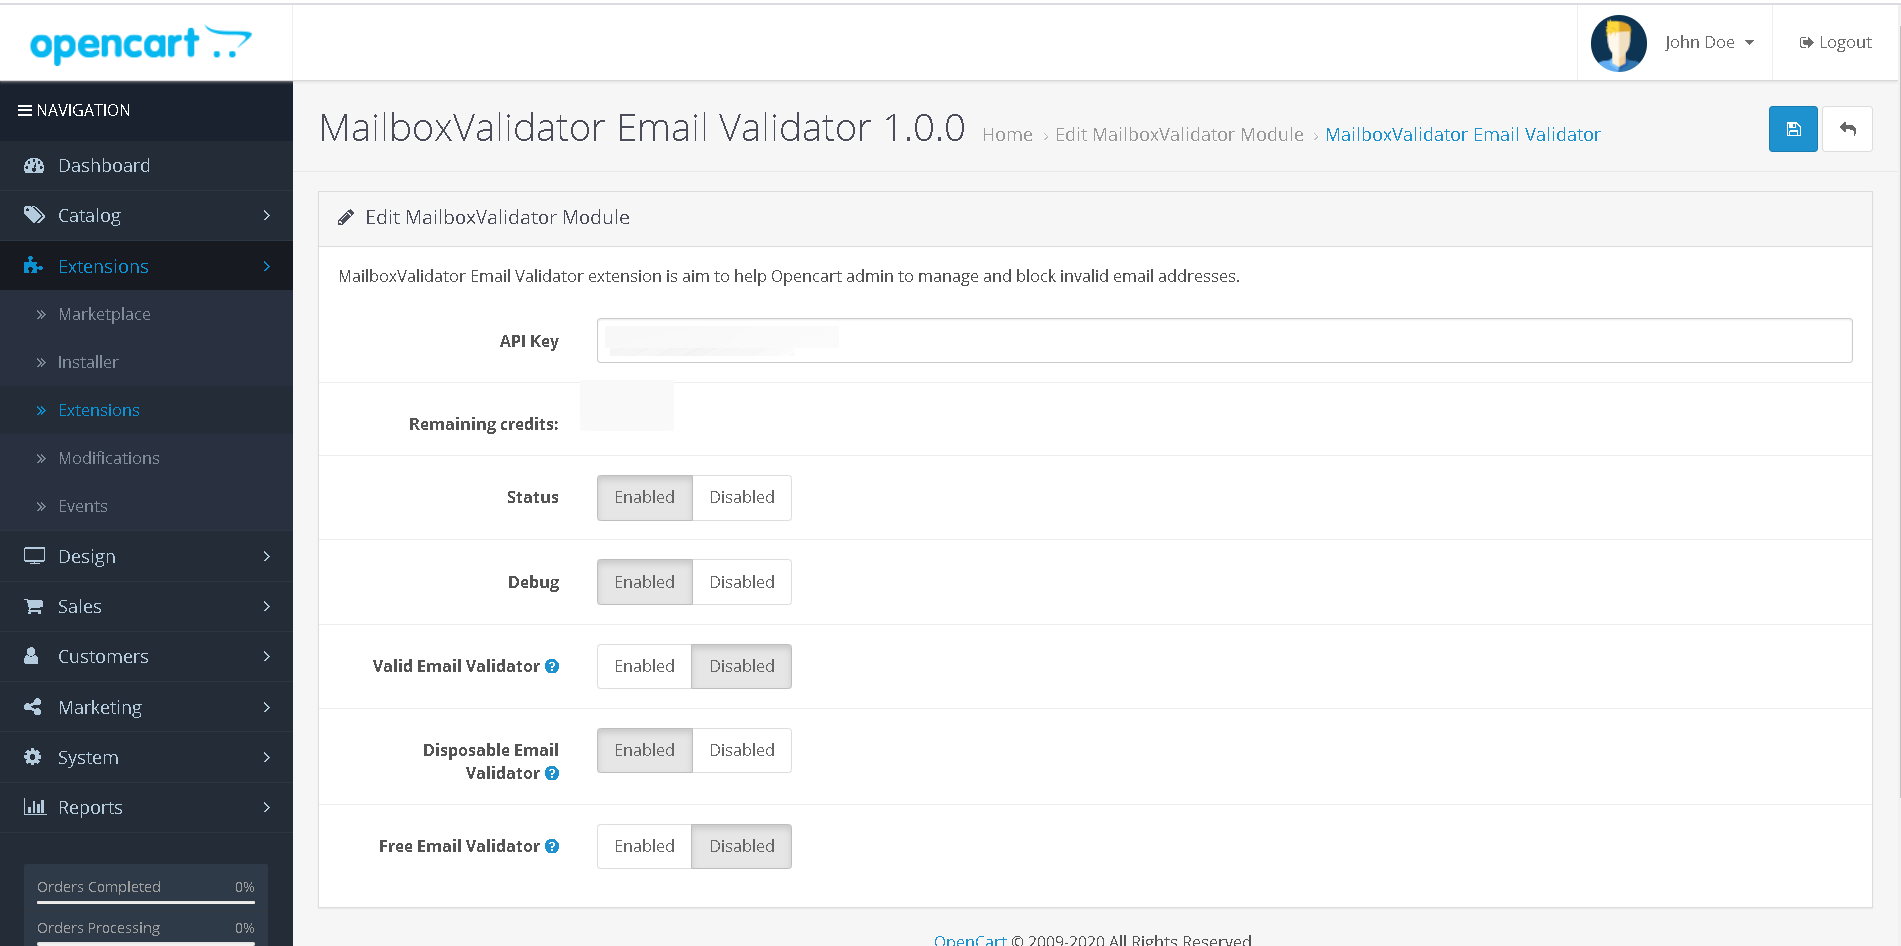
The various validators function similarly with minor differences. The valid email validator will validate the email address based on the status of the email address. The disposable email validator will check whether the email address is coming from a disposable email address service provider or not. Last but not least, the free email validator will check if the email address is coming from a free email address service provider or not.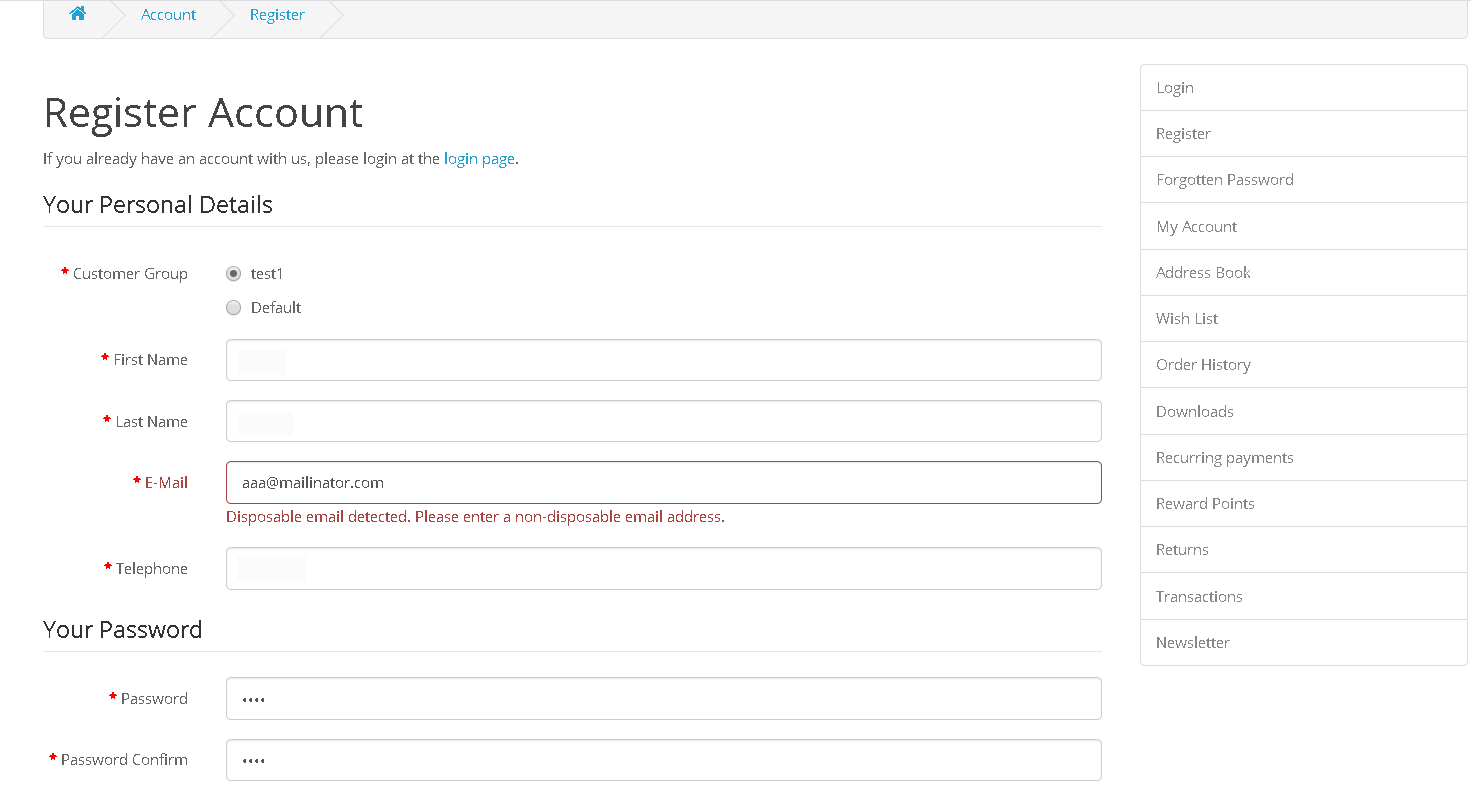
#
Get started with MailboxValidator #
Improve your email deliverability and sender reputation in email marketing.
Register today and clean your email lists for FREE!